
 By Elson Correia
I have built Dozens of NPM packages and have been changing my setup over time for all of them. It can get complex when you want something nice to code in and your package to be easily used by ESM and CJS projects. Not to mention the TypeScript setup.
So, let me show you how I do it…
I have also shared how to set up a Node TypeScript project in a different post that you can check.
How to Set up a TypeScript + NodeJs Server *With new releases and tools, setting up a node server has become simple until NodeJs ships with typescript…*medium.com
Create a project
For example, I'll create a simple package to expose my amazing addTwo function.
export const addTwo = (a: number, b: number) => {
    return a + b
}
I'll first create a project directory and, inside, run the following commands:
#initialize an npm project
# accepting all defaults for the package.json
npm init -y

# initializse a git repository
git init
The above commands assume you already have npm and git installed on your machine.
We will need Node to interpret JavaScript files with ES module syntax so we need to change the package.json file to be a type module with the following line:
"type": "module"
We can then add the add-two.ts file to a src directory and expose it via index.ts with the following code:
export * from './add-two'
We should now have the following project structure to start:
my-project-directory
  src
    add-two.ts
    index.ts
  package.json
Where the package.json looks like this:
{
  "name": "my-sample-project",
  "version": "1.0.0",
  "description": "",
  "main": "index.js",
  "type": "module",
  "scripts": {
    "test": "echo \"Error: no test specified\" && exit 1"
  },
  "keywords": [],
  "author": "",
  "license": "ISC"
}
Feel free to fill in the details.
Configure Typescript
We can then go ahead and install the latest TypeScript with npm install -D typescript and proceed to initialize the TypeScript configuration with tsc --init. This should add a tsconfig.json file to the project root.
Go ahead and replace the tsconfig.json content with the following:
{
    "compilerOptions": {
        "target": "ESNEXT",
        "module": "esnext",
        "lib": ["dom"],
        "declaration": true,
        "declarationMap": false,
        "outDir": "./dist/types",
        "downlevelIteration": true,
        "strict": true,
        "alwaysStrict": true,
        "resolveJsonModule": true,
        "allowSyntheticDefaultImports": true,
        "moduleResolution": "node",
        "esModuleInterop": true,
        "skipLibCheck": true,
        "forceConsistentCasingInFileNames": true,
        "allowJs": true
    },
}
Notice that the outDir is ./dist/types . This is because we will only use TypeScript for types and not to build stuff.
Feel free to change things in this configuration based on your package type, but these are the defaults I always need for my packages.
I am also making some assumptions, like including dom as a lib because you could create packages for the client. Notice that the module is esnext and the moduleResolution is set to node . Well, this is a Node project, and we will be using ESM syntax and not CJS.
We can now add the following script to the package.json file:
"build": "rm -rf dist && tsc --emitDeclarationOnly"
We will come back to it later; for now, run the command npm run build , and your project should look like this:
my-project-directory
  dist
    types
      add-two.d.ts
      index.d.ts
  node_modules
  src
    add-two.ts
    index.ts
  package.json
  package-lock.json
  tsconfig.json
Learn more about TypeScript configuration for more details and options.
Configure Jest for Test
It is better to set up tests before everything else to ensure everything else will work with the setup; otherwise, having to go back and change things is a headache. Trust me.
I want you to install a few things with the following command:
npm install -D jest ts-jest @types/jest
If the package you are building will be used in the browser or by a Node setup of a client-side project, you will need to install this additional stuff:
npm install -D jsdom jest-environment-jsdom @types/jsdom
These will allow your code in the browser to run in the Node environment.
Now, create a jest.config.cjs file in the root of your project with the following code.
module.exports = {
    transform: {
        '^.+\\.ts$': 'ts-jest',
    },
    testEnvironment: 'node',
    testRegex: './src/.*\\.(test|spec)?\\.(js|ts)$',
    moduleFileExtensions: ['ts', 'js', 'json', 'node'],
    roots: ['<rootDir>/src'],
}
If you will need the DOM, change the testEnvironment property to be jsdom.
The jest config is a *.cjs file because jest will throw a ReferenceError: module is not defined in ES module scope if the type is set to module in the package.json.
Now add the following scripts to the package.json
"test": "jest",
"test:coverage": "jest --coverage",
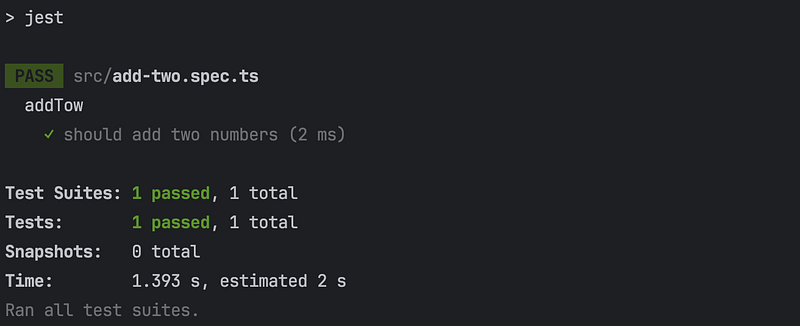
To test this, let’s add a test file called add-two.spec.ts inside the src directory containing the following:
import { addTwo } from './add-two'

describe('addTow', () => {
    it('should add two numbers', () => {
        expect(addTwo(1, 2)).toBe(3)
    })
})
… and run the command npm test.
Learn more about jest configuration for more details and options.
Configure EsLint and Prettier
Now, let’s ensure our code stays formatted consistently, and we can lint our code for best practices enforcement.
First, install eslint and prettier along with additional related stuff with the following command:
npm install -D prettier eslint eslint-config-prettier eslint-config-standard eslint-plugin-import eslint-plugin-n eslint-plugin-prettier eslint-plugin-promise
These are only basic and simple eslint plugins to start, but feel free to add more. I usually go to the awesome-eslint GitHub repo to find some good ones.
Now, add .eslintrc file with the following staring setup:
{
  "extends": [
    "eslint:recommended", "plugin:@typescript-eslint/recommended", "prettier"
  ],
  "parser": "@typescript-eslint/parser",
  "plugins": [
    "@typescript-eslint"
  ],
  "root": true
}
Also, add .prettierrc file with this basic styling setup:
{
    "trailingComma": "es5",
    "tabWidth": 4,
    "semi": false,
    "singleQuote": true
}
Also, consider adding .eslintignore and .prettierignore to exclude files and directories you don’t want eslint and prettier to affect.
You can then go ahead and add the following scripts to package.json :
"lint": "eslint ./src && prettier --check .",
"format": "eslint ./src --fix && prettier --write ."
Here, I'm combining both where lint will lint the project and check format while format will fix lint and formatting issues. Feel free to change this. It is just a preference of mine.
Now, make sure your IDE or code editor uses these configurations and makes it so it runs the format command whenever you save your changes.
Learn more about eslint configuration and prettier configuration for more details and options.
Configure Build
Now that everything is set up, let’s ensure we package everything to be shipped to package managers.
One thing to consider is how projects out there will use your package, and these can be new or old setups of Node, which means they could use CJS or ESM syntax.
I like my package to be no pain for either setup, so I always build my project twice for each option and then use package.json to tell these packages how to import mine.
I will be using build because it is amazing and fast, but if you are building a package for specific environments like React, you might need to use a different setup to build your package.
I assume your package is strictly JavaScript, so let’s continue…
npm install -D esbuild
All you need to do now is add the following scripts to package.json .
"build:cjs-min": "esbuild `find src \\( -name '*.ts' ! -name '*.spec.ts' ! -name '*.test.ts' ! -name 'client.ts' \\)` --minify --outdir=dist/cjs --platform=node --sourcemap --format=cjs --keep-names --target=esnext",

"build:esm-min": "esbuild `find src \\( -name '*.ts' ! -name '*.spec.ts' ! -name '*.test.ts' ! -name 'client.ts' \\)` --minify --outdir=dist/esm --platform=node --sourcemap --format=esm --keep-names --target=esnext",
The commands grab everything except test files and the client.ts (check the next section to understand). Then it is minifying, building with different formats, and outputting them into separate directories — cjs and esm directories.
If you run both commands, you can see the output in the dist directory in separate folders.
We need to tell package.json how to expose these with the following change:
"exports": {
    "import": "./dist/esm/index.js",
    "require": "./dist/cjs/index.js",
    "default": "./dist/cjs/index.js",
    "types": "./dist/types/index.d.ts"
},
First, we tell Node where the types definitions are by specifying the types property with the path to our types directory. Next, we tell it how this package is exported.
For projects that will import our package with import * from "package-name" we will point them to the esm directory. For package that will import our package with const {} = require("package-name") we will point them to the cjs directory. By default, we will use the js directory since that's Node default.
Build for the Client/Browser
If you are creating a package in which code can be used both on the Browser and Node environments, you need to export your code differently.
If your package does not have dependencies, you could use the esm version of your file to import your package on the browser and use it. Something like this:
<script src="app.js" type="module"></script>

// app.js
import {} from "https://unpkg.com/package-name/dist/esm/index.js"
However, usually, that’s not the case, and you want a single minified output to be used directly in the browser.
For that, I'll create a client.ts file inside the src directory with the following content:
import { addTwo } from './add-two'

if (window) {
    window.BFS = {
        ...window.BFS,
        addTwo,
    }
}
I’m creating a global object on the window object to avoid possible conflicts and adding everything I want to expose inside. In this case, the addTwo function.
This can then be used in the browser like this:
<script src="https://unpkg.com/package-name/dist/client.min.js" ></script>

<script>
  const {addTwo} = BFS;

  addTwo(1, 2);
</script>
All you need to do is add the following script to the package.json file.
"build:browser": "esbuild src/client.ts --bundle --minify --keep-names --sourcemap --target=esnext --outfile=dist/client.min.js",
That’s why I love esbuild. It imports everything in one file and exports it minified with its source map.
Update the build command.
Now, we can bring it all together with a proper build command. First, we will need to install the npm-run-all package and then change it to:
"build": "rm -rf dist && npm-run-all lint test && tsc --emitDeclarationOnly && npm-run-all build:cjs-min build:esm-min build:browser",
The build command will clean the dist directory, create the typescript type definitions, lint and check code format, run tests, and then build everything.
Final touches
Change tsconfig.json to only include things in src directory and exclude tests and client.ts files.
"include": ["./src/**/*"],
"exclude": ["src/**/*.spec.ts", "src/client.ts"]
Add a .npmignore file to ensure your package only includes what it needs. Here are a few things to add:
.idea
node_modules
src
tsconfig.json
package-lock.json
jest.config.js
.npmignore
.gitignore
*.tgz
coverage
.github
.prettierrc
.prettierignore
.eslintrc.cjs
.eslintignore
jest.config.cjs
What next?
I have made this into a GitHub template you can fork to start your next Node package project.
GitHub - beforesemicolon/node-typescript-project-template at npm-package *A simple template for a node+typescript project. Contribute to beforesemicolon/node-typescript-project-template…*github.com
YouTube Channel: Before Semicolon Website: beforesemicolon.com